As a Citrix CSP, having a good set of scripts to deploy a base environment is critical. Setting up 50 environments by hand would take far more time than with good scripting. Now that I’ve finally had some time to sit down and not be working on 6.5 stuff, I have been able to write scripts to install and configure XenDesktop 7.6 with Storefront 3 using PowerShell (and some batch). Full disclosure! I am NOT good at PowerShell, or scripting in general. I’m sure there are a million better/easier ways to do these things, but what I have works, dammit. The point of this blog is to show you the commands, and what they do. I will attach my final scripts where you can tune and tweak as needed.
As always, credit where credit is due. I took some code from Aaron Parker from here. I also took some code from Eric from here. Lastly, I’d like to give a BIG THANKS to Esther Barhel (@virtuEs_IT) for helping me out with the non-documented Storefront 3 PowerShell commands.
If you have read my blog, most of my environments are built for the SMB/SMG space. That being said in this blog we will be setting up a single instance configuration. There will be a single server with both the XDC and Storefront roles on it. You could easily take this code to add additional XDCs or Storefront servers to your environment. I will be using code snippets to explain what they are for during the blog.
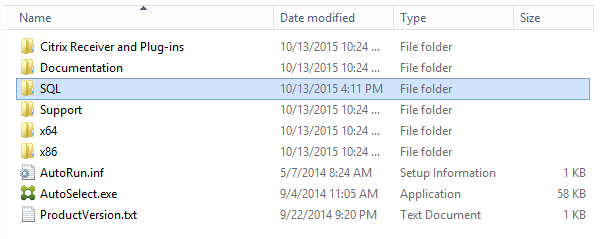
The first thing we want to do is install XenDesktop. As this is a small environment, we are going to use SQL Express on the XDC. Personally, I do not like to use SQL instances, so in my configuration I am going to install SQL with the default instance instead of the SQLEXPRESS instance. For this, I have created a directory with the XD7.6 disk extracted and shared on the network. I then created a SQL directory and extracted SQL2014 Express in there. I shared this directory out as XA76. (Long live XenApp!)
Installing SQL and XenDesktop
This first “Script” simply does a net use to the share, installs SQL, then installs XenDesktop with only the Controller and Studio roles. Note that you do not want to install Storefront yet. This script will reboot the server. As a scripting/PowerShell noobie, I learned a lot during this. For example. In PowerShell, the use of –% tells PowerShell to stop parsing code after those characters. This helped me a lot because PowerShell was trying to parse the \’s and /’s and failing miserably.
|
|
net use --% x: \\10.56.90.20\XA76 x: cd '.\SQL' write-host "Installing SQL" .\SETUP.EXE --% /QS /ACTION=install /FEATURES=SQL,Tools /INSTANCENAME=MSSQLSERVER /IAcceptSQLServerLicenseTerms=true cd .. cd '.\x64\XenDesktop Setup' write-host "Installing XenDesktop" .\XenDesktopServerSetup.exe --% /components CONTROLLER,DESKTOPSTUDIO /NOSQL /quiet /configure_firewall shutdown -f -r -t 2 |
XenDesktop Configuration
After the server is done rebooting, we can start with the configuration of the XenDesktop Site. First thing we want to do is setup the databases. I’m going to setup the default databases to the local system we just installed SQL on, using the NetBIOS Name of the domain as the site name. In this example $NBN is NetBIOS Name.
|
|
New-XDDatabase -AllDefaultDatabases -DatabaseServer $env:COMPUTERNAME -SiteName $NBN |
The next thing we want to do is setup the Site. In my configuration, I use the NetBIOS name and append it to the DBs. In this example $LDB would be CitrixConfigLoggingTEST where TEST is the NetBIOS name. The same is done with the Monitor Database and Site Database.
|
|
New-XDSite -DatabaseServer $env:COMPUTERNAME -LoggingDatabaseName $LDB -MonitorDatabaseName $MDB -SiteDatabaseName $SDB -SiteName $NBN |
Next, we want to setup licensing. This is pretty self-explanatory. This sets the license server and the port. IT then sets the product and edition. I generally use a generic DNS name for the licensing server, “ctxlicesnse” in this example, that points to the license server IP address. Then this sets up the product code and product edition. My example shows a setup for XenDesktop Advanced edition. You can get these variables with the following commands.
|
|
PS C:\> Get-ConfigProduct Code Name ---- ---- XDT XenDesktop MPS XenApp |
|
|
PS C:\> Get-ConfigProductEdition -ProductCode XDT PLT ENT APP ADV STD |
Here is my code to add licensing.
|
|
Set-XDLicensing -LicenseServerAddress ctxlicense -LicenseServerPort 27000 Set-ConfigSite -LicensingModel Concurrent -ProductCode XDT -ProductEdition ADV |
Next, we setup a Machine catalog. This assumes that we already have at least one VDA setup, already pointed to this Delivery Controller. This is a simple persistent desktop Machine Catalog. This is setup for XenApp type Full Desktops (MultiSession), and we add the first XD box to the Machine Catalog.
|
|
New-BrokerCatalog -SessionSupport MultiSession -ProvisioningType Manual -AllocationType Random -Name 2012R2 -Description 2012R2 -PersistUserChanges OnLocal -MachinesArePhysical $true New-BrokerMachine -MachineName TEST-RDU-XD-01 -CatalogUid 1 |
This next bit of code sets up the Desktop Group. This code snip was taken from Aaron Parker’s blog here and edited for my using. I encourage you to read his blog page to understand what this stuff does. It is much more involved than my code, and does a great job setting up the delivery group. I will try to break down the piece for all of us though. Let’s walk through the variables first.
|
|
$XDC = $env:COMPUTERNAME $assignedGroup = "$NBN`\$NBN`_CTX_Desktop" $desktopGroupName = "Some Desktop Group" $desktopGroupPublishedName = "Some Desktop Group" $desktopGroupDesc = "Some Desktop Group" $colorDepth = 'TwentyFourBit' $deliveryType = 'DesktopsandApps' $desktopKind = 'Shared' $sessionSupport = "MultiSession" $functionalLevel = 'L7_6' $timeZone = 'EST Eastern Standard Time' $offPeakBuffer = 10 $peakBuffer = 10 $machineCatalogName = "2012R2" |
You can set a TON of stuff in here, and it can get complicated when you are doing MCS/PVS and stuff. In this example, we are setting up a XenApp Full Desktop to the Machine Catalog we created above (2012R2). $deliverytime can be DesktopsOnly, DesktopsandApps, or AppsOnly. $deliverykind can be Shared or Private. $sessionSupport can be MultiSession or SingleSession. This is a new environment, with all 7.6, so we set the $functionalLevel to L7_6. This can be set to 5, 7, or 7.6. There are so many other commands in here that Aaron has detailed; I won’t go into them here. The command I have used for this example is below.
|
|
New-BrokerDesktopGroup -ErrorAction SilentlyContinue -AdminAddress $XDC -Name $desktopGroupName -DesktopKind $desktopKind -DeliveryType $deliveryType -Description $desktopGroupPublishedName -PublishedName $desktopGroupPublishedName -MinimumFunctionalLevel $functionalLevel -ColorDepth $colorDepth -SessionSupport $sessionSupport -InMaintenanceMode $False -IsRemotePC $False -SecureIcaRequired $False -Scope @() |
The next thing we need to do is to add machines to the desktop group.
|
|
$machineCatalog = Get-BrokerCatalog -AdminAddress $XDC -Name $machineCatalogName Add-BrokerMachinesToDesktopGroup -AdminAddress $XDC -Catalog $machineCatalog -Count $machineCatalog.UnassignedCount -DesktopGroup $desktopGroup |
Then we want to add users to the desktop group
|
|
$brokerUsers = New-BrokerUser -AdminAddress $XDC -Name $assignedGroup New-BrokerEntitlementPolicyRule -AdminAddress $XDC -Name ($desktopGroupName + "_" + $Num.ToString()) -IncludedUsers $brokerUsers -DesktopGroupUid $desktopGroup.Uid -Enabled $True -IncludedUserFilterEnabled $False |
Lastly, we want to allow access through Access Gateway
|
|
New-BrokerAccessPolicyRule -AdminAddress $XDC -Name $accessPolicyRule -IncludedUsers @($brokerUsers.Name) -AllowedConnections 'ViaAG' -AllowedProtocols @('HDX','RDP') -AllowRestart $True -DesktopGroupUid $desktopGroup.Uid -Enabled $True -IncludedSmartAccessFilterEnabled $True -IncludedSmartAccessTags @() -IncludedUserFilterEnabled $True |
Here is the full script from start to finish.
1 2 3 4 5 6 7 8 9 10 11 12 13 14 15 16 17 18 19 20 21 22 23 24 25 26 27 28 29 30 31 32 33 34 35 36 37 38 39 40 41 42 43 44 45 46 47 48 49 50 51 52 53 54 55 56 57 58 59 60 61 62 63 64 65 66 67 68 69 70 71 72 73 74 75 76 77 78 79 80 81 82 83 |
add-pssnapin c* $XDC = $env:COMPUTERNAME $nbn = $env:USERDOMAIN $assignedGroup = "$NBN`\$NBN`_CTX_Desktop" $LDB = "CitrixConfigLogging" + $nbn $MDB = "CitrixMonitor" + $nbn $SDB = "Citrix" + $nbn # Desktop Group properties $desktopGroupName = "Some Desktop Group" $desktopGroupPublishedName = "Some Desktop Group" $desktopGroupDesc = "Some Desktop Group" $colorDepth = 'TwentyFourBit' $deliveryType = 'DesktopsandApps' $desktopKind = 'Shared' $sessionSupport = "MultiSession" $functionalLevel = 'L7_6' $timeZone = 'EST Eastern Standard Time' $offPeakBuffer = 10 $peakBuffer = 10 $machineCatalogName = "2012R2" write-host "Creating Citrix Databases" New-XDDatabase -AllDefaultDatabases -DatabaseServer $env:COMPUTERNAME -SiteName $NBN write-host "Setting up Site" New-XDSite -DatabaseServer $env:COMPUTERNAME -LoggingDatabaseName $LDB -MonitorDatabaseName $MDB -SiteDatabaseName $SDB -SiteName $NBN write-host "Setting up licensing" Set-XDLicensing -LicenseServerAddress ctxlicense -LicenseServerPort 27000 Set-ConfigSite -LicensingModel Concurrent -ProductCode XDT -ProductEdition ADV write-host "Setting up Machine Catalog" New-BrokerCatalog -SessionSupport MultiSession -ProvisioningType Manual -AllocationType Random -Name 2012R2 -Description 2012R2 -PersistUserChanges OnLocal -MachinesArePhysical $true New-BrokerMachine -MachineName TEST-RDU-XD-01 -CatalogUid 1 $VerbosePreference = "Continue" write-host "Creating Desktop Group" If (!(Get-BrokerDesktopGroup -Name $desktopGroupName -ErrorAction SilentlyContinue)) { Write-Verbose "Creating new Desktop Group: $desktopGroupName" $desktopGroup = New-BrokerDesktopGroup -ErrorAction SilentlyContinue -AdminAddress $XDC -Name $desktopGroupName -DesktopKind $desktopKind -DeliveryType $deliveryType -Description $desktopGroupPublishedName -PublishedName $desktopGroupPublishedName -MinimumFunctionalLevel $functionalLevel -ColorDepth $colorDepth -SessionSupport $sessionSupport -InMaintenanceMode $False -IsRemotePC $False -SecureIcaRequired $False -Scope @() } If ($desktopGroup) { Write-Verbose "Getting details for the Machine Catalog: $machineCatalogName" $machineCatalog = Get-BrokerCatalog -AdminAddress $XDC -Name $machineCatalogName Write-Verbose "Adding $machineCatalog.UnassignedCount machines to the Desktop Group: $desktopGroupName" $machinesCount = Add-BrokerMachinesToDesktopGroup -AdminAddress $XDC -Catalog $machineCatalog -Count $machineCatalog.UnassignedCount -DesktopGroup $desktopGroup Write-Verbose "Creating user/group object in the broker for $assignedGroup" If (!(Get-BrokerUser -AdminAddress $XDC -Name $assignedGroup -ErrorAction SilentlyContinue)) { $brokerUsers = New-BrokerUser -AdminAddress $XDC -Name $assignedGroup } Else { $brokerUsers = Get-BrokerUser -AdminAddress $XDC -Name $assignedGroup } $Num = 1 Do { $Test = Test-BrokerEntitlementPolicyRuleNameAvailable -AdminAddress $XDC -Name @($desktopGroupName + "_" + $Num.ToString()) -ErrorAction SilentlyContinue If ($Test.Available -eq $False) { $Num = $Num + 1 } } While ($Test.Available -eq $False) Write-Verbose "Assigning $brokerUsers.Name to Desktop Catalog: $machineCatalogName" $EntPolicyRule = New-BrokerEntitlementPolicyRule -AdminAddress $XDC -Name ($desktopGroupName + "_" + $Num.ToString()) -IncludedUsers $brokerUsers -DesktopGroupUid $desktopGroup.Uid -Enabled $True -IncludedUserFilterEnabled $False # Check whether access rules exist and then create rules for direct access and via Access Gateway $accessPolicyRule = $desktopGroupName + "_Direct" If (Test-BrokerAccessPolicyRuleNameAvailable -AdminAddress $XDC -Name @($accessPolicyRule) -ErrorAction SilentlyContinue) { Write-Verbose "Allowing direct access rule to the Desktop Catalog: $machineCatalogName" New-BrokerAccessPolicyRule -AdminAddress $XDC -Name $accessPolicyRule -IncludedUsers @($brokerUsers.Name) -AllowedConnections 'NotViaAG' -AllowedProtocols @('HDX','RDP') -AllowRestart $True -DesktopGroupUid $desktopGroup.Uid -Enabled $True -IncludedSmartAccessFilterEnabled $True -IncludedUserFilterEnabled $True } Else { Write-Error "Failed to add direct access rule $accessPolicyRule. It already exists." } $accessPolicyRule = $desktopGroupName + "_AG" If (Test-BrokerAccessPolicyRuleNameAvailable -AdminAddress $XDC -Name @($accessPolicyRule) -ErrorAction SilentlyContinue) { Write-Verbose "Allowing access via Access Gateway rule to the Desktop Catalog: $machineCatalogName" New-BrokerAccessPolicyRule -AdminAddress $XDC -Name $accessPolicyRule -IncludedUsers @($brokerUsers.Name) -AllowedConnections 'ViaAG' -AllowedProtocols @('HDX','RDP') -AllowRestart $True -DesktopGroupUid $desktopGroup.Uid -Enabled $True -IncludedSmartAccessFilterEnabled $True -IncludedSmartAccessTags @() -IncludedUserFilterEnabled $True } Else { Write-Error "Failed to add Access Gateway rule $accessPolicyRule. It already exists." } } #End If DesktopGroup |
Installing Storefront
This portion of the scripting is going to do a bunch of things. It will install the pre-requisites for Storefront, including IIS. It installs Storefront. It imports a certificate and binds it to the default website. The sets up the initial Storefront base URL then finishes the configuration. The first thing I did was to copy the 3.x version of CitrixStoreFront-x64 into my share to the x64\StoreFront directory and overwrite the default one. Luckily, this works so we can use XenDesktopServerSetup.exe again to install it.
The first thing we are going to do is install the pre-requisites and install Storefront. Again, I am just going to do a net-use to my share and run everything.
|
|
net use --% x: \\10.56.90.20\XA76 Import-Module ServerManager write-host "Installing Storefront Prereqs" Add-WindowsFeature AS-Net-Framework,Web-Net-Ext45,Web-AppInit,Web-ASP-Net45,Web-ISAPI-Ext,Web-ISAPI-Filter,Web-Default-Doc,Web-HTTP-Errors,Web-Static-Content,Web-HTTP-Redirect,Web-HTTP-Logging,Web-Filtering,Web-Windows-Auth,Web-Client-Auth x: cd '.\x64\XenDesktop Setup' write-host "Installing Storefront" .\XenDesktopServerSetup.exe --% /components STOREFRONT /NOSQL /quiet |
Next, we want to import the certificate and bind it to the default web site. First, we ask for the cert password.
|
|
$myPW = read-host -Prompt "Enter Cert Password here" |
We then want to import the certificate and assign it to the default website. Copy the .pfx file to the root of C:\. You will need the thumbprint of the certificate to put in the XXXXXXXXXXXXXXXXXX location of the script.
|
|
$certpw = ConvertTo-SecureString -String $myPW -Force -AsPlainText Import-PfxCertificate -filepath "C:\cert.pfx" Cert:\LocalMachine\My -Password $certpw New-WebBinding -Name "Default Web Site" -IPAddress "*" -Port 443 -Protocol https cd IIS: cd .\SSLBindings Get-Item Cert:\LocalMachine\My\XXXXXXXXXXXXXXXXXXXXXXXXXXXXXXXXXXX | new-item 0.0.0.0!443 c: |
Storefront Configuration
This gets us all set to start configuring Storefront. We will first need to import the Storefront PowerShell modules.
|
|
. "C:\Program Files\Citrix\Receiver StoreFront\Scripts\ImportModules.ps1" |
Let us take a look at some of the variables we will be using here.
|
|
$nbn = $env:USERDOMAIN $GatewayAddress = "https://site.domain.com" $Farmname = "XenApp76 Farm" $Port = "80" $TransportType = "HTTP" $sslRelayPort = "443" $LoadBalance = $false $FarmType = "XenDesktop" $fqdn = "$env:computername.$env:userdnsdomain" $baseurl = "https://" + $fqdn $SFPath = "/Citrix/" + $nbn.toLower() $SFPathWeb = "$SFPath`Web" $SFPathDA = "$SFPath`DesktopAppliance" $GatewayName = "TEST-RDU-NS-01" $staservers = "http://" + $fqdn + "/scripts/ctxsta.dll" $snipIP = "10.56.13.9" |
Again, keep in mind this is a small environment, so we will be using a single server for the XDC/Storefront roles. My $baseurl variable will resolve to https://server.domain.local. I set the store name to $nbn (NetBIOS Name), in this example it is TEST. Then using some simple PowerShell I set $SFPath, $SFPathWeb, and $SFPathDA to /Citrix/test, /Citrix/testWeb, and /Citrix/testDesktopAppliance respectively. You can set these variables as appropriate for your environment. The first command we want to run will do the initial configuration of Storefront.
|
|
Set-DSInitialConfiguration -hostBaseUrl $baseurl -farmName $Farmname -port $Port -transportType $TransportType -sslRelayPort $sslRelayPort -servers $fqdn -loadBalance $LoadBalance -farmType $FarmType -StoreFriendlyName TEST -StoreVirtualPath $SFPath -WebReceiverVirtualPath $SFPathWeb -DesktopApplianceVirtualPath $SFPathDA |
The next thing I do here is setup the beacons. I set this up now because if you setup the gateway first, it sets the $baseurl as an external beacon. In my configuration, I do NOT want $baseurl to be an external beacon. At the time of writing this blog, Citrix has not written the full documentation for these PowerShell modules. I have already put in an RFE to get these up on Citrix’s site. That being said, I was not able to figure out HOW to remove an external beacon. The gateway module detects if you have any external beacons configured. If it detects none are configured, it automatically makes $baseurl and www.citrix.com the two external beacons. Setting up the external beacons is as simple as these commands.
|
|
$beaconID = ([guid]::NewGuid()).ToString() Add-DSGlobalExternalBeacon -BeaconID $beaconID -BeaconAddress http://www.google.com $beaconID = ([guid]::NewGuid()).ToString() Add-DSGlobalExternalBeacon -BeaconID $beaconID -BeaconAddress http://www.citrix.com |
Next, we are going to add a NetScaler gateway to the configuration. Reference the variables above. Not too much complicated in this command. This box is also the XDC, so the STA setup simply points to http://server.domain.local/scripts/ctxsta.dll.
|
|
$GatewayID = ([guid]::NewGuid()).ToString() Add-DSGlobalV10Gateway -Id $GatewayID -Name $GatewayName -Address $GatewayAddress -Logon Domain -IPAddress $snipIP -SessionReliability $false -SecureTicketAuthorityUrls $staservers -IsDefault $true |
The previous command creates the NetScaler gateway. We then have to enable NetScaler authentication and link this gateway to the store.
|
|
$gateway = Get-DSGlobalGateway -GatewayId $GatewayID Set-DSStoreGateways -SiteId 1 -VirtualPath $SFPath -Gateways $gateway Set-DSStoreRemoteAccess -SiteId 1 -VirtualPath $SFPath -RemoteAccessType "StoresOnly" Add-DSAuthenticationProtocolsDeployed -SiteId 1 -VirtualPath /Citrix/Authentication -Protocols CitrixAGBasic Set-DSWebReceiverAuthenticationMethods -SiteId 1 -VirtualPath $SFPathWeb -AuthenticationMethods ExplicitForms,CitrixAGBasic |
This next command was from the Eric’s blog referenced above. This disables the check publisher’s certificate revocation to speed up console start-up
|
|
set-ItemProperty -path "REGISTRY::\HKEY_CURRENT_USER\Software\Microsoft\Windows\CurrentVersion\WinTrust\Trust Providers\Software Publishing\" -name State -value 146944 |
Lastly we as we are using $fqdn as $baseurl, we will want to turn the loopback to OnUsingHTTP because the certificate is not going to match. You can look at more details on this command here.
|
|
Set-DSLoopback -SiteId 1 -VirtualPath $SFPathWeb -Loopback OnUsingHttp |
There we have it. Storefront configuration is DONE, dude! All we need to do is setup an internal DNS cname to point site.domain.com to server.domain.local and we have single URL for internal/external access to your XenDesktop 7.6 environment.
Full Script is below.
1 2 3 4 5 6 7 8 9 10 11 12 13 14 15 16 17 18 19 20 21 22 23 24 25 26 27 28 29 30 31 32 33 34 35 36 37 38 39 40 41 42 43 44 45 46 47 48 49 50 51 52 53 54 55 56 57 58 59 60 61 62 63 64 65 66 67 68 69 70 71 72 73 74 75 |
# Certificate Password #================== $myPW = read-host -Prompt "Enter Cert Password here" # StoreFront Parameters #================== $nbn = $env:USERDOMAIN $GatewayAddress = "https://site.domain.com" $Farmname = "XenApp76 Farm" $Port = "80" $TransportType = "HTTP" $sslRelayPort = "443" $LoadBalance = $false $FarmType = "XenDesktop" $fqdn = "$env:computername.$env:userdnsdomain" $baseurl = "https://" + $fqdn $SFPath = "/Citrix/" + $nbn.toLower() $SFPathWeb = "$SFPath`Web" $SFPathDA = "$SFPath`DesktopAppliance" $GatewayName = "TEST-RDU-NS-01" $staservers = "http://" + $fqdn + "/scripts/ctxsta.dll" $snipIP = "10.56.13.9" #write-host "Mapping Drive" net use --% x: \\10.56.90.20\XA76 Import-Module ServerManager write-host "Installing Storefront Prereqs" Add-WindowsFeature AS-Net-Framework,Web-Net-Ext45,Web-AppInit,Web-ASP-Net45,Web-ISAPI-Ext,Web-ISAPI-Filter,Web-Default-Doc,Web-HTTP-Errors,Web-Static-Content,Web-HTTP-Redirect,Web-HTTP-Logging,Web-Filtering,Web-Windows-Auth,Web-Client-Auth x: cd '.\x64\XenDesktop Setup' write-host "Installing Storefront" .\XenDesktopServerSetup.exe --% /components STOREFRONT /NOSQL /quiet #write-host "Copy certificate to C:\ before moving on" #pause write-host "Installing Certificate" $certpw = ConvertTo-SecureString -String $myPW -Force -AsPlainText Import-PfxCertificate -filepath "C:\wildcard.vc3advantage.com-NEW.pfx" Cert:\LocalMachine\My -Password $certpw New-WebBinding -Name "Default Web Site" -IPAddress "*" -Port 443 -Protocol https cd IIS: cd .\SSLBindings Get-Item Cert:\LocalMachine\My\8CE850C9DCD7C26DF8E8FD4C44BF7D9E586E8AD1 | new-item 0.0.0.0!443 c: # Import Storefront module #========================== write-host "Installing Storefront Modules" . "C:\Program Files\Citrix\Receiver StoreFront\Scripts\ImportModules.ps1" # Setup Initial Configuration #============================ write-host "Initial Storefront Configuration" Set-DSInitialConfiguration -hostBaseUrl $baseurl -farmName $Farmname -port $Port -transportType $TransportType -sslRelayPort $sslRelayPort -servers $fqdn -loadBalance $LoadBalance -farmType $FarmType -StoreFriendlyName TEST -StoreVirtualPath $SFPath -WebReceiverVirtualPath $SFPathWeb -DesktopApplianceVirtualPath $SFPathDA write-host "Configuring Beacons" $beaconID = ([guid]::NewGuid()).ToString() Add-DSGlobalExternalBeacon -BeaconID $beaconID -BeaconAddress http://www.google.com $beaconID = ([guid]::NewGuid()).ToString() Add-DSGlobalExternalBeacon -BeaconID $beaconID -BeaconAddress http://www.citrix.com $GatewayID = ([guid]::NewGuid()).ToString() Add-DSGlobalV10Gateway -Id $GatewayID -Name $GatewayName -Address $GatewayAddress -Logon Domain -IPAddress $snipIP -SessionReliability $false -SecureTicketAuthorityUrls $staservers -IsDefault $true $gateway = Get-DSGlobalGateway -GatewayId $GatewayID Set-DSStoreGateways -SiteId 1 -VirtualPath "/Citrix/test" -Gateways $gateway Set-DSStoreRemoteAccess -SiteId 1 -VirtualPath /Citrix/test -RemoteAccessType "StoresOnly" Add-DSAuthenticationProtocolsDeployed -SiteId 1 -VirtualPath /Citrix/Authentication -Protocols CitrixAGBasic write-host "Disable check publisher's cert revocation" set-ItemProperty -path "REGISTRY::\HKEY_CURRENT_USER\Software\Microsoft\Windows\CurrentVersion\WinTrust\Trust Providers\Software Publishing\" -name State -value 146944 write-host "Setting Loopback to OnUsingHttp" Set-DSLoopback -SiteId 1 -VirtualPath $SFPathWeb -Loopback OnUsingHttp |